Table of Contents
Introduction
By adding Easy2Boot to an existing Ventoy USB drive you can add E2B which has these extra Legacy-BIOS features:
- Boot DOS images
- Boot and install XP from ISO with Mass Storage Drivers
- Install Win98/Win2K
- Generic method of legacy-booting Linux ISOs which Ventoy may not support
- Use SDI_CHOCO to automate Legacy Windows 7/8/10/11 installs with drivers and apps
- Run PassPass to bypass Windows User Account passwords (legacy Windows)
- Access a password protected Windows account using UtilMan automated method
Note: E2B Partition images (.imgPTN) and some other E2B features are NOT supported and will not work unless you make a standard E2B USB drive (which also includes Ventoy and agFM).
How to add E2B to a Ventoy USB drive
The Ventoy USB drive must be an MBR partitioned disk (not GPT or else E2B will report errors).
If you have made a Ventoy USB drive and you would like to add Easy2Boot to it, you can do it as follows:
- First, I highly recommend that you reformat the main Ventoy partition as NTFS. This is not essential, but I highly recommend it because DOS and some Windows versions may not recognise exFAT or ext formats and FAT32 does not support files larger than 4GB. Also, NTFS is needed for Ventoy and E2B if you want to boot Windows VHD files. Make sure you do not use GPT Partition Style for the USB drive.
- Create a new empty folder on your Desktop – e.g. name it Easy2Boot.
- Download the latest .zip version of E2B (get the E2B DPMS version if you want to install XP from an XP ISO – otherwise get the smaller non-DPMS version of E2B) and extract all the files to the new folder made in Step 2.
- Run UPDATE_E2B_DRIVE.CMD from the download folder (or copy all the E2B files directly to the root of the Ventoy main volume)
- Create a new \ventoy folder on the Ventoy USB drive if one does not already exist – e.g. E:\ventoy.
- Copy the file at “\_ISO\docs\Sample mnu files\Ventoy\ventoy_grub.cfg” to the \ventoy folder on the USB drive. If you have already made a ventoy_grub.cfg file, then you will need to edit the existing file and add in the new menu entry that you will find within the sample file.
- Copy the file at “\_ISO\docs\Sample mnu files\Ventoy\ReloadVentoy.mnu” to the \_ISO\MAINMENU folder on the USB drive.
- To boot .wim files, add bootmgr by running \_ISO\docs\Make_E2B_USB_Drive\Add_Bootmgr_to_E2B_drives.cmd. If you get any problems booting .wim files then copy the bootmgr file to the root of the USB drive (bug was fixed in E2B v2.14).
- Add any payload files that you want to run using Easy2Boot to one of the Easy2Boot menu folders which are all under \_ISO.
For instance, if you want to install XP, then add the XP ISO to the \_ISO\WINDOWS\XP folder.
If you want to boot a LINUX ISO file that will not boot using Ventoy, add it to the \_ISO\LINUX folder. - Before booting to E2B, you should run the \MAKE_THIS_DRIVE_CONTIGUOUS.cmd file under Windows. Linux ISO files need to be contiguous for E2B. This only needs to be run once or whenever you copy a new payload file to the USB drive.
Note: Downloading a payload file directly to the USB drive from the internet can result in a highly fragmented file – always download to another drive first and then copy the file to the USB drive.
Tip: To save 500MB of space, you can delete the \_ISO\CONTIG.ISO file, if it exists, as long as all files are contiguous.
Usage
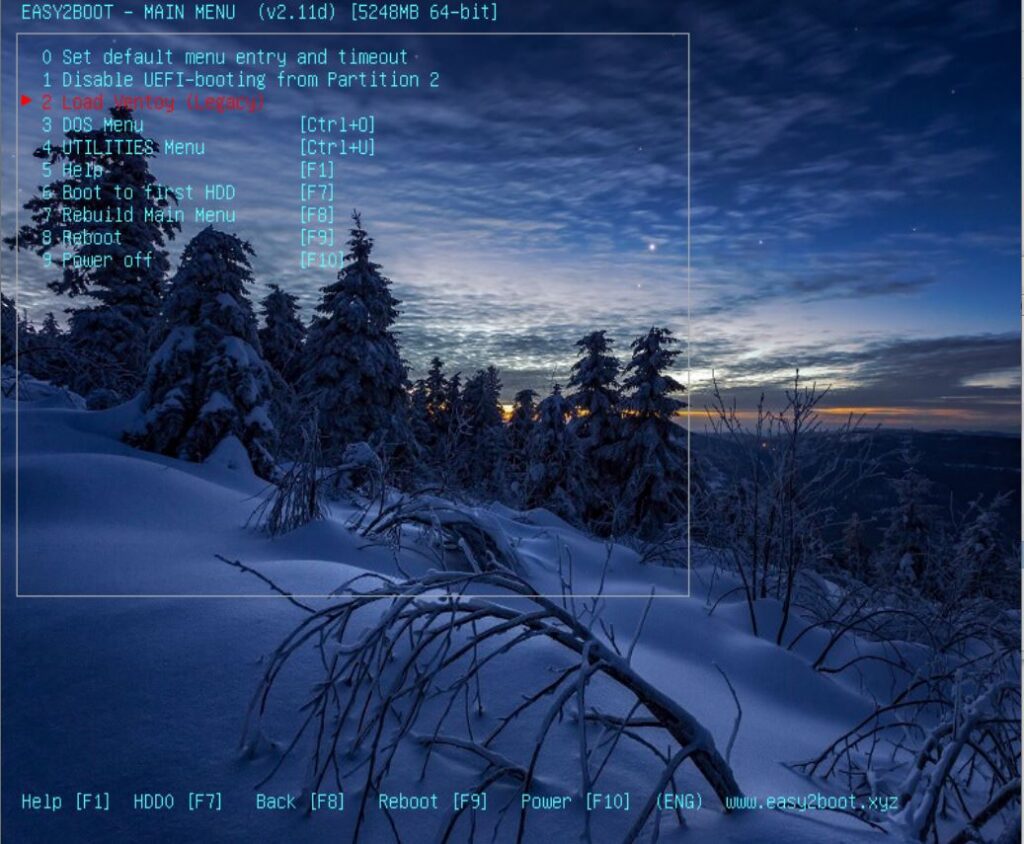
If you Legacy-boot to Ventoy, you can now press F6 under Ventoy to load the ventoy_grub.cfg file and you should see an Easy2Boot menu entry:

This will only be seen if you have booted to Ventoy in Legacy mode.
Tip: If you get a garbled display when Easy2Boot loads, Press F7 first in Ventoy for text mode, before pressing F6 and then booting to Easy2boot.
Select the menu entry to load the E2B menu system (based on open-source grub4dos)…
Note that you will need to move any ISOs that you want to boot from the E2B Menu system over to one of the E2B menu folders under \_ISO.
Most payloads should work as on a standard E2B USB drive, however .imgPTN files will not work as well as a few other file types such as .hfs, haiku, .isoBSD, etc,.
Tip: The \E2B Launcher.exe Windows utility will help you learn about E2B and has context-sensitive help (but only the E2B tab will work correctly).
Booting files from other folders
If you have a Linux payload file (or WinPE or WIM or VHD) that is not in a standard E2B menu folder, you can add it to your E2B menu as follows:
- To boot to \Ubuntu64.iso we would create a \_ISO\LINUX\Ubuntu.mnu file as follows:
title Ubuntu x64\nThis runs the Ubuntu iso file using E2B
qrun ()/Ubuntu64.iso
errorcheck off
boot
configfile (md)0x3000+0xA0
errorcheck on
If the filename contains spaces, you must add a \ character before each space. e.g.
/Ubuntu x64 v1.021.iso becomes /Ubuntu\ x64\ v1.021.iso,
e.g. /010 Ubuntu v20.04.3 (64-bit).iso
title Ubuntu x64 v20.04.3\nThis runs the Ubuntu iso file using E2B
qrun ()/010\ Ubuntu\ v20.04.3\ (64-bit).iso
errorcheck off
boot
configfile (md)0x3000+0xA0
errorcheck on
Windows Install ISOs however may need to be in the correct E2B menu folder for the full benefit of using E2B.
Updating
To update E2B, just extract the E2B files from the latest E2B zip file as described in Step 3 and 4 above (and delete the \_ISO\CONTIG.ISO file to save space).
Updating Ventoy is done in the usual way using the Ventoy tool provided.
Add grubfm (optional)
A standard E2B USB drive also contains a grub2 multiboot menu system called ‘agFM’. This is based on a1ive’s open-source grubfm project.
grubfm comes in the form of an ISO file, so it is very easy to add it to your Ventoy USB drive and it provides another alternative way to boot a payload file which you can try if Ventoy and E2B both fail.
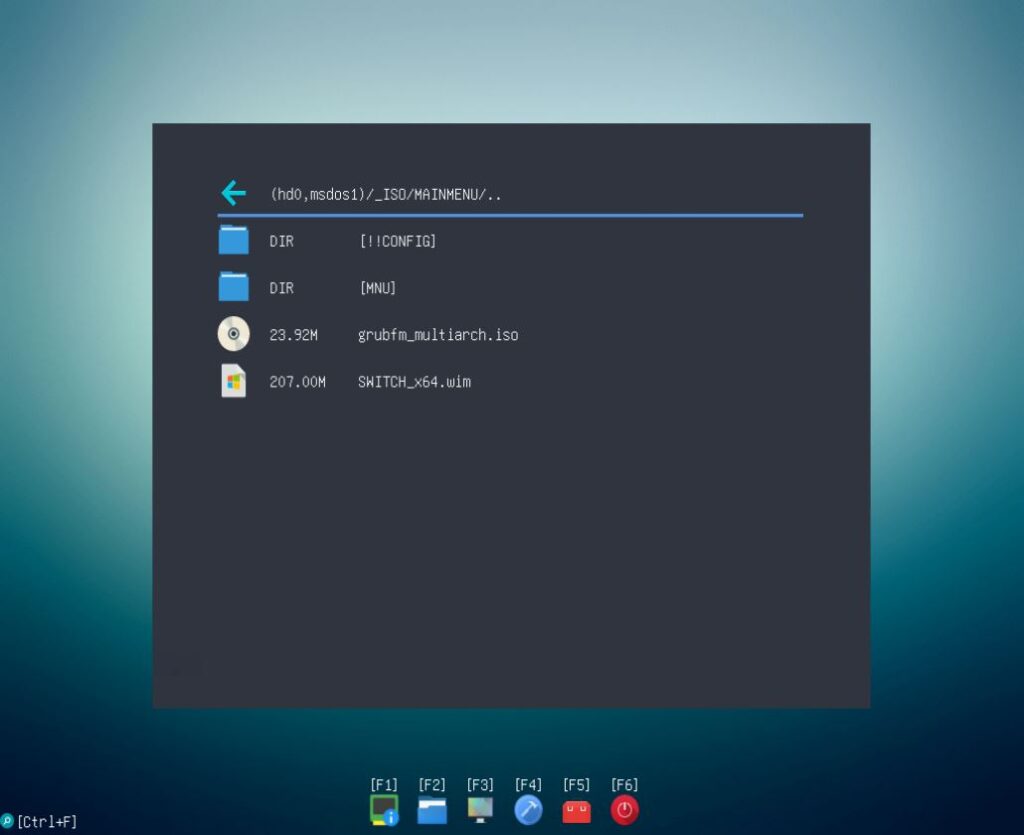
- Go to https://github.com/a1ive/grub2-filemanager/releases and download the latest version of grubfm_multiarch.iso
- Copy the ISO file to the \_ISO\MAINMENU folder so that you can boot it using both E2B or Ventoy.
grubfm_multiarch.iso supports legacy and UEFI.

grubfm will allow you to select and boot from other partitions and disks (e.g. Linux, Windows 7/8/10/11 Install ISOs, VHD files, WIM files, EFI files, etc.).
Tip: Press F4 and select ‘Hide non-bootable files’ for a cleaner menu…
Note: grubfm can be configured and extended simply by adding a config file to a new \boot\grubfm folder on the main Ventoy Partition 1 volume.
The file name must be lowercase and not have any extension.
\boot\grubfm\config
# ======= SET grubfm defaults ========

#run .cfg and some other files immediately
grubfm_set --boot 1
#hide non-bootable files
grubfm_set --hide 1
#sort files by name (1=do not sort)
export grubfm_disable_qsort=0

set color_normal=white/black
The config file uses standard grub2 syntax. Comment lines are preceded by #.
You can also set a different grub2 theme, keyboard type, display resolution, password, defaults, text mode, language, etc. See eBook #4 for details or the githib page.