Table of Contents
About .mnu files
A .mnu file is simply a text file that wil be automatically added into E2B’s own menu system (.mnu files are ignored by agFM or Ventoy). It can contain the same commands that are used in a grub4dos menu.lst file. A .mnu file can be in ASCII or UTF-8 format (save the .mnu file using Notepad). grub4dos commands are always lowercase and are case-sensitive.
The E2B menu system will enumerate all .mnu files under each menu subfolder (e.g. \_ISO\LINUX\… and \_ISO\BACKUP\…, etc.) and this includes all nested sub-folders. Payload files (such as .iso files, .img files, .wim files, etc.) will only appear if they are in the menu subfolder but they are not enumerated if they are in folders below the top menu folder.
\_ISO\LINUX\ubuntu_persistence.mnu
\_ISO\LINUX\iso\ubuntux64.iso                     <<< this will not be listed by the E2B menu system
Comment lines
Although a variety of characters can be used in grub4dos menus to start a comment line, I always use the # character. Any line that begins with # will be treated as a comment line and will be ignored.
title and iftitle
A .mnu file that is used to specify a menu entry should begin with either a title command or an iftitle command. If using iftitle, ensure there are no spaces after the [ or before the ] symbols. See below for more details about iftitle. An iftitle command is only seen if the test condition in square brackets that follows it, is true, e.g.
title This menu will always be seen\n
reboot

iftitle [if 1==1] THIS MENU ENTRY WILL ALWAYS BE SEEN\n
reboot

iftitle [if 1==2] THIS MENU ENTRY WILL NEVER BE SEEN!\n
reboot

iftitle [if not 1==1] THIS MENU ENTRY WILL NEVER BE SEEN!\n
reboot

iftitle [if exist $HOME$/fred.iso] This menu entry will only be seen if fred.iso is present in the same folder as this .mnu file\n
reboot
You can find many example .mnu files in the \_ISO\docs\Sample mnu Files folder. E2B will usually search all menu folders and sub-folders for .mnu files (with the exceptions of the AUTO and WINDOWS folders). Folder names must NOT contain a dot (.) in the name – e.g. \_ISO\LINUX\FRED.1\FRED.mnu will be ignored
Writing .mnu fles
Tip: To make a simple .mnu file from a ‘payload’ file (e.g. an ISO), drag-and-drop the payload file onto the
“\_ISO\docs\E2B Utilities\E2B MNU Maker.cmd” file.
For those payload files which do not work correctly when simply placed in an E2B menu folder (even with a renamed file extension) or if they have special requirements, such as they need to use a persistent filesystem to store changes, you will need to use a special grub4dos menu file for them. For Easy2Boot these extra files have the .mnu file extension and they contain a grub4dos menu that has been specially written for a particular ISO or payload file.
Note: If a .mnu file is placed at level 2 (e.g. \_ISO\LINUX) and the .iso file is also placed in the same level 2 folder – there will be TWO menu entries in the E2B sub-menu – one for the .iso file and one for the .mnu file. To avoid this, place both files at the 3rd level or deeper (e.g. \_ISO\LINUX\MNU) and you will only see the .mnu menu entry.
For example, for a linux ISO that requires a .mnu file, you could add the payload file (e.g. ISO file) and it’s matching .mnu file to the \_ISO\LINUX\Linux folder (note that the correct sub-folder may need to be created to match the one specified in the .mnu file, so you may need to make a new ‘Linux’ folder – also note that Linux is case sensitive so use the correct case for any linux parameters which are in the .mnu file).
Some new .mnu files can be downloaded from the Easy2Boot Download page but most are in the \_ISO\docs\sample mnu files folder contained in the E2B download. Once added, the .mnu file entry will be listed in the sub-menu once it has been selected from the Main menu.
Note that a .mnu file will work in any standard menu folder (e.g. \_ISO\MAINMENU or \_ISO\DOS or \_ISO\ANTVIRUS) or any sub-folder of any name under these folders – the names of the 3rd level folders (e.g. MNU) have no special significance – any name can be used because E2B searches all sub-folders for all .mnu files.
.mnu files do not work in the \_ISO\AUTO folder (or below) and do not work in any \_ISO\WINDOWS folder or sub-folders.
Instructions on how to use each .mnu file are included as text comments inside each sample .mnu file – please read the instructions in each .mnu file. You may also need to edit the .mnu file if you are using a slightly different version of the ISO so that the ISO filenames are correct. If your language uses special non-ASCII characters, save the .mnu file in UTF-8 format.
Tip: If you want to have two menu entries to run the same linux ISO, e.g. one with and one without persistence, place both the .iso file and the .mnu file at the 2nd level (e.g. \_ISO\LINUX).
IMPORTANT: Use forward-slash / instead of \ for folder paths in a .mnu file – grub4dos is like linux and uses / instead of \.
Beware of filenames with spaces!
When a path or filename contains a space, you must precede each space character with \ (backslash) – example for “Ubuntu Boot CD 2014.iso” use:
Ubuntu\ Boot\ CD\ 2014.iso
I tend to avoid spaces in payload filenames when using .mnu file for this reason!
%MFOLDER%, $NAME$ and $HOME$ Keywords
When specifying a path in .mnu file, you can use the %MFOLDER% variable which will be set to the parent’s menu folder (e.g. \_ISO\MAINMENU) or you can use $HOME$ which will be set to the .mnu path.
For example, the following are all equivalent if the .mnu file is located in the \_ISO\LINUX\Linux folder:
- /_ISO/LINUX/Linux/Ubuntu.iso
- %MFOLDER%/Linux/Ubuntu.iso
- $HOME$/Ubuntu.iso
I recommend you use $HOME$ whenever possible.
If the file name contains spaces such as Ubuntu x86.iso, then precede each space with a \ character – e.g. $HOME$/Ubuntu\ x86.iso
$NAME$ is the filename (without extension) of the .mnu or .txt file that it is used in. The filename can contain spaces. (v1.67+)
e.g. You have two files with identical filenames (.mnu and .iso):
- \_ISO\MAINMENU\MNU\Ubuntu.iso
- \_ISO\MAINMENU\MNU\Ubuntu.mnu
iftitle [if exist $HOME$/$NAME$.ISO] Ubuntu \n Boot from $NAME$.ISO
set ISO=$HOME$/$NAME$.ISO
(more grub4dos lines here)...
boot
You should name the payload file exactly the same as the .mnu file and so you do not need to modify the text inside the .mnu file. You can then copy or move both files to any standard menu folder or download a later version of the ISO and simply rename the .mnu file.
Note that because we use iftitle, if you delete the Ubuntu.iso file, then the menu entry will not appear in the menu. If you add Ubuntu.iso back again, then it will be listed in the menu again.
Tip: /%grub%/ is used as the path to the \_ISO\e2b\grub folder, which is where most grub4dos batch files and utilities are located.
Tip: if a .mnu menu entry is not automatically numbered by grub4dos and you cannot select it with the UP/DOWN cursor keys (but can select it using RIGHT/LEFT cursor keys), simply add ‘boot’ as the last line of the menu.
Using iftitle in .mnu files
iftitle [if exist $HOME$/fred.iso] This menu entry will only be seen if fred.iso is present in the same folder as this .mnu file\n
The expression inside the square brackets [expr] must equate to TRUE for the menu entry to be displayed.
Any variable inside the square brackets must already exist.
All menu entries with iftitle statements are evaluated first by grub4dos befoe the menu entries are displayed – after that, each menu entry is listed in the menu.
You can use iftitle in .mnu and .txt files.
For instance, suppose we only want to display an Ubuntu 64-bit ISO if the system’s CPU is a 64-bit CPU, we could place the following line in our \_ISO\MyE2B.cfg file (which is executed at an early stage):
checkrange 2,3 is64bit && set BIT64=1
This will set the variable BIT64 to the value of 1 if the CPU is a 64-bit CPU – the variable BIT64 will be available for all menus.
Now we can use the BIT64 variable in a .mnu or .txt file:
iftitle [if exist BIT64] Ubuntu x64\n
/%grub%/qrun.g4b $HOME%/Ubuntu64.iso
boot
To use a variable it must be enlosed in % signs, so we could instead write:
iftitle [if "%BIT64%"=="1"] Ubuntu x64\n
/%grub%/qrun.g4b $HOME%/Ubuntu64.iso
boot
Note that we enclose the BIT64 variable in double-quotes (“) – this is because if BIT64 was not defined, if %BIT64%==1 would resolve to ‘if ==1’ which is an invalid expression and would cause an error. So by using “%BIT64%” the expression resolves to ‘if “”==”1″‘ which has the correct syntax. We could also use ‘if exist BIT64’ to test for the existence of the BIT64 variable.
The \_ISO\Sample_MyE2B.cfg file contains examples of other variables you can use, e.g. MYMEMMB for the size of memory in MB, or MYDISKGB for the size of the USB boot disk in GB, GB4 if there is more than 4GB of memory, etc.
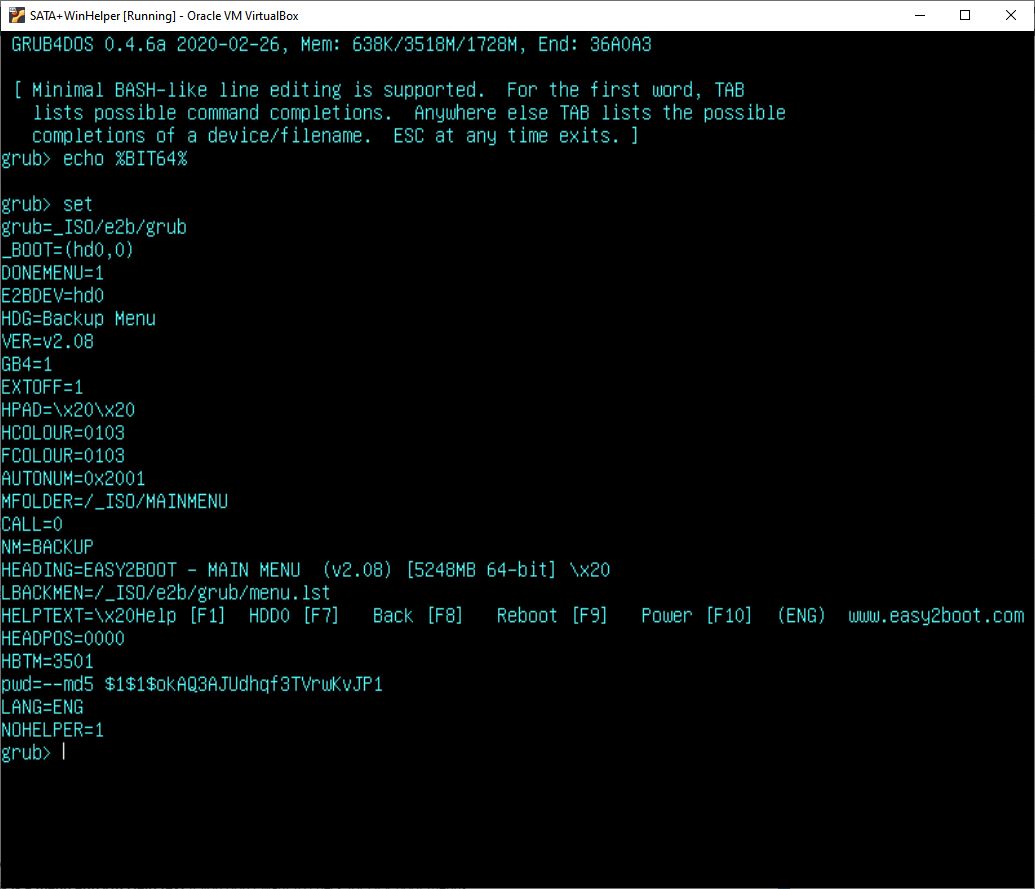
Tip: In the grub4dos console, you can type ‘set’ to list all currently set grub4dos variables:
$$STRxxxx Keywords
If you see these $$STR Keywords used in an E2B .mnu file or .txt file, they will be replaced by the equivalent text from a STRINGS.txt language file (e.g. using text inside the \_ISO\e2b\grub\ENG\STRINGS.txt file if English is the selected language).
If you are creating your own .mnu or .txt files, just substitute ordinary text in-place of the Keywords
e.g.
iftitle [if "%GFX%"==""] $$STRm005can be changed to:
iftitle [if "%GFX%"==""] This is the menu entry\nThis is the help text below the menu boxNote: Hotkeys do not work in a GFX Boot menu, so often there will be two almost identical menu entries in an E2B .mnu file, one with a hotkey and one without a hotkey in the ‘iftitle’ line.. The [if “%GFX%”==””] portion means ‘if a GFX boot menu is not being used’ – so the menu entry will not be displayed if the user has configured E2B to load a GFX Boot ‘message’ menu file instead of an ordinary wallpaper bitmap file. You can omit this portion and just use title This is a menu entry\n Help text if you don’t want to check for GFX Boot menus.
Note that because hotkeys don’t work in GFX Boot menus, do not define a hotkey in your .mnu or .txt files if you want to use GFX Boot menus.
Add a non-persistent menu entry to a persistent .mnu file
Normally, you will place an ISO and it’s .mnu file at the 3rd level (e.g. \_ISO\MAINMENU\MNU) and then only the .mnu menu entry will appear in the menu (the .ISO file will not be listed in the menu because it is not at the 2nd level). However, if your payload is an ISO file and has a .mnu file for persistence, you can add both the .iso and the .mnu file to a 2nd level folder (such as \_ISO\MAINMENU or \_ISO\LINUX) – then there will be two menu entries, one for the .mnu file and one for the .iso. You can add a .txt file to change how the .iso file is listed in the menu. If the .mnu and .iso file are added to the 3rd level folders (e.g. \_ISO\MAINMENU\MNU or \_ISO\LINUX\MNU) then only the .mnu file will appear in the menu. OR Simply add these two lines to the very top or very bottom of a persistent .mnu file to add a non-persistent menu entry to make a menu entry that will run the iso file directly:
title Boot directly from linux myiso.iso\nHERE IS MY HELP TEXT
/%grub%/QRUN.g4b   $HOME$/myiso.iso
boot
If you want to be able to delete the large .ISO file, but leave the .mnu file on the USB drive in case you want to restore it later, you will need to use iftitle so that the menu entry is only seen when the .iso file is present:
ftitle [if exist $HOME$/myiso.iso] Boot directly from myiso.iso\nHERE IS MY HELP TEXT
/%grub%/QRUN.g4b   $HOME$/myiso.iso
boot
QRUN.g4b is the grub4dos batch file which is responsible for booting a payload file according to it’s file extension.
If you want a menu entry to run a payload which is in a different folder, then specify the complete path, e.g.
.mnu file = _ISO\MAINMENU\MyIso.mnu so we get an entry in the Main Menu:
iftitle [if exist/_ISO/WIN/myiso.iso] Boot directly from myiso.iso\nRun an ISO in a different folder
/%grub%/QRUN.g4b   /_ISO/WIN/myiso.iso
boot
Override the file extension
Normally, the file extension of a file determines how E2B will run it. There may be some circumstances where you want to have the same .ISO file (for example) but run it in two different ways. For instance, if your USB drive is a Zalman or IODD drive and you need to keep the .iso file extension on all files so that the drive can find them.
To do this create a .mnu file with the following format
fred.mnu
title HERE IS MY TITLE\nHERE IS MY HELP TEXT
/%grub%/QRUN.g4b  FORCE.isoPE  $HOME$/myiso.iso
boot
This will run MYISO.ISO as if it had a file extension of .ISOPE.
Here is another example of how to run the same .imgPTN file in two different ways – (place the .mnu file and the .imgPTN file in a MNU 3rd-level sub-folder)
clonezilla.mnu
title Clonezilla \nClonezilla image
/%grub%/QRUN.g4b $HOME$/clonezilla-live-2.2.2-37-i686-pae.imgPTN
boot

title Clonezilla with E2B partitions 2 and 3 accessible \nRun Clonezilla with E2B HDD partitions available
/%grub%/QRUN.g4b FORCE.imgPTNLBAa23 $HOME$/clonezilla-live-2.2.2-37-i686-pae.imgPTN
boot
Auto-run .imgPTN files
Normally, when you select a .imgPTN file (of any type), E2B will display some information about the file and then prompt the user to ask if it is OK to switch partitions. This can be suppressed for .imgPTN files by adding “AUTO” to the file extension, e.g. .imgPTNAUTO, however we can also use the AUTOCSM variable in a .mnu file as follows:
clonezilla_auto.mnu
title Clonezilla AutoCSM\nAuto-run Clonezilla image and display the CSM menu
set AUTOCSM=1
/%grub%/QRUN.g4b $HOME$/clonezilla-live-2.2.2-37-i686-pae.imgPTNLBA23
boot
If you don’t want the clonezilla .imgPTNLBA23 file to be listed in the menu as well as the .mnu file entry, place both the image file and the .mnu in a subfolder (e.g. move it from \_ISO\BACKUP to \_ISO\BACKUP\MNU or \_ISO\BACKUP\ANYNAME).
Tip: If you add ‘set AUTOCSM=1’ to your \_ISO\MyE2B.cfg file, then the .imgPTN user prompt text will be suppressed for all .imgPTN-family files.
Calling other bootloaders from a .mnu file
If you are using a .mnu file, you may need to ‘tidy up’ the BIOS environment before you load your new payload.
In particular, if your menu has an animation, you should use these lines as the first lines in your menu:
errorcheck off
splashimage --animated=0
map --unmap=0:03 > nul
map --unhook
E2B already does this for you in most cases, but not if you use your own .mnu file.
If you are booting to another payload which uses the BIOS (e.g. DOS, grub4dos, syslinux, grub2 MBR, etc.) you may need to add these lines to prevent strange memory corruption issues.