Table of Contents
FreeBSD, GhostBSD, MidnightBSD, OPNsense, FreeNAS & pfSense
FreeBSD requires a partition type number set in the MBR and does not like overlapping partitions. For E2B (legacy) you can use the .isoBSD file extension (or a .imgPTN23 file – read below) or use Ventoy (agFM often does not work) – see Ventoy supported ISO list here. For UEFI – try Ventoy.
Use .isoBSD extension (legacy boot only)
WARNING: Using .isoBSD will change the USB drive partitions! READ CAREFULLY!
I successfully MBR-booted FreeBSD-11.1-RELEASE-amd64-bootonly.iso and v13.0, TrueOS-Desktop-18.03-x64-DVD.iso, OPNsense-17.7.5-OpenSSL-dvd-amd64.iso, Nas4Free.iso and pfSense-CE-2.4.4-RELEASE-amd64.iso using the .isoBSD file extension.
1. Change the file extension of your BSD-based ISO file to end in .isoBSD and copy it to your \_ISO\LINUX folder (or any standard menu folder).
2. Run \MAKE_THIS_DRIVE_CONTIGUOUS (run as admin).cmd. E2B Partition 3 must be unused\empty.
Note: When using the .isoBSD file extension, E2B will switch partitions so that the E2B partition disappears.
3. To restore the E2B partition, simply MBR-boot again (it will then timeout and restore the partitions) or run the \RESTORE E2B PARTITION.cmd file as Administrator.
.isoBSD is for MBR-boot only, and does not work with all BSD ISOs – see bottom of page for more details.
Tip: If booting on a headless appliance (i.e. no VGA display), configure the E2B default menu option + 10 second timeout so that your ISO will automatically run from the Main Menu after a 10 second delay (e.g. using \QEMU_MENU_TEST or another system).
You can also use FreeBSD-based hybrid ISO files (e.g. FreeBSD-11.1.iso or OPNsense-17.7.5-OpenSSL-dvd-amd64.iso) by making use of a .imgPTN file (scroll down for details).
MemStick images
How to add FreeBSD memstick payloads and pfSense memstick payloads to E2B.
Easy2Boot and MPI Tool Pack support FreeBSD 9 and 10 ‘memstick’ images.
For GhostBSD, download the .img files and not the .iso files.
For MidnightBSD, use the ‘memstick’ download.
If the memStick .img file contains multiple images inside it (e.g. pfSense v2.4), then this process will not work.
For OPNsense .bz2 downloads for USB drives (e.g. serial download), extract the .img file from the .bz2 file using WinRar or 7Zip and follow the instructions below.

The procedure is to use the MakePartImage process, but as the FreeBSD memstick.img files are already in the correct format for a FreeBSD partition, the .img files don’t actually need converting or modifying!:

1. Create a new empty folder on the Windows Desktop (or anywhere else).
2. Drag-and-drop the empty folder onto the MPI_FAT32 MPI Desktop shortcut to make a 30MB (or as small as possible – e.g. 10MB) partition image with no payload. If prompted for a target file, use a filename with either a .imgPTN or .imgPTNA5 file extension – e.g. FreeBSD_10_1.imgPTN or FreeBSD_10_1.imgPTNA5.
Do NOT use a filename that has any dots in it because it will also appear in the E2B Menu – e.g. FreeBSD10.1.imgPTNA5 would not be a good name because the ‘FreeBSD10.1’ file (see below) would also be visible in the menu!
3. Copy the new .imgPTN file to a menu folder (e.g. \_ISO\LINUX, a 2nd level folder – NOT \_ISO\LINUX\MNU).
4. Copy your FreeBSD memstick .img file to the same folder that the .imgPTN file is in and rename it to match the name of the .imgPTN file but WITH NO FILE EXTENSION – e.g.
FreeBSD_10_1.imgPTN (10-30MB)
FreeBSD_10_1 (NO FILE EXTENSION OR DOTS – e.g. 700MB memstick.img file renamed to match with no file extension)
Tip: Download the .xyz (compressed) non-UEFI version, e.g. FreeBSD-10.1-RELEASE-i386-memstick.img.xz and then unzip it to obtain the .img file. The .xyz files are smaller than the .img files. I also tested this with pfSense-CE-memstick-2.3.5-RELEASE-i386.img and OPNsense-18.1.6-OpenSSL-serial-amd64 (1).img.
5. Make all files contiguous on the drive.
6. Use the E2B menu to select the .imgPTN file.
Grub4dos can access the files on a FreeBSD type A5 partition just fine as it understands the FreeBSD volume format.
To add more FreeBSD versions to the E2B USB drive, just copy and rename the .imgPTN file (or make a fresh one) and then rename the new FreeBSD memstick .img file to match it.
Note that only ‘memstick’ images for USB drives will work in this way. Luckily, GhostBSD .img files are in the memstick format.
For installing/upgrading OpenBSD – see karl’s blog. For installxx.iso OpenBSD, see this blog post.
FreeBSD 11 x64
The .img file format has changed for FreeBSD11. We can UEFI-boot however (or MBR-boot using Clover) as follows:
FreeBSD-11.0-RELEASE-amd64-memstick.img
- Use 7Zip GUI to open the memstick.img file
- Extract the .ufs file as a single large file directly to your E2B USB drive – e.g. \_ISO\LINUX\.ufs
- Rename \_ISO\LINUX\.ufs to \_ISO\LINUX\FreeBSD11
- Double-click on EFI System image in 7Zip to open it
- Extract the whole EFI folder into a new FreeBSD11 folder on desktop – e.g. we get (desktop)\FreeBSD11\EFI\BOOT\BOOTX64.EFI
- Create .imgPTN file from the FreeBSD11 folder on the Desktop
- Copy the FreeBSD11.imgPTN file to \_ISO\LINUX on your E2B USB drive, you now have:
\_ISO\LINUX\FreeBSD11.imgPTN
\_ISO\LINUX\FreeBSD11 - Make all files contiguous
- Switch to the FreeBSD11.imgPTN file using the E2B menu (do not use SWITCH_E2B.exe or use the latest version and choose 0xA5 for the partition type when prompted)
Note: If you wish to use SWITCH_E2B.exe to select the FreeBSD11.imgPTN file, you must then modify the \menu.lst file inside the .imgPTN and add the line:
parttype (hd0,2) 0xa5
to the start of the \menu.lst file or if SWITCH_E2B.exe prompts you for the type, enter 0xA5.

Use the ‘Clover 64-bit UEFI Boot Menu’ option or directly UEFI-boot from the E2B drive.
MBR-booting FreeBSD-based ISOs (FreeBSD, OPNsense, pfSense, Nas4Free, TrueOS)
An easier way to use this method is to simply use the .isoBSD file extension (E2B v1.A5+).
Alternatively, the method below uses your own .imgPTN file instead of the default bsd.imgptn file that is already used by .isoBSD…
You must use MakePartImage v 0.079 or later for this. The process is essentially the same as for memstick images.
I tested FreeBSD-11.1-RELEASE-amd64-bootonly.iso, TrueOS-Desktop-18.03-x64-DVD.iso, OPNsense-17.7.5-OpenSSL-dvd-amd64.iso, Nas4Free.iso and pfSense-CE-2.4.4-RELEASE-amd64.iso.
However, FreeNAS 11 U4 and GhostBSD 11.1 ISOs did not work using this method.
1. Drag-and-drop an empty folder onto the FAT32_MPI Desktop shortcut to create a FreeBSD.imgPTN file.
2. Copy the FreeBSD.imgPTN file to the E2B drive – e.g. \_ISO\LINUX\FreeBSD.imgPTN
Tip: You can use a file extension of .imgPTNAUTO to suppress the user prompt.
3. Copy the FreeBSD ISO file to the same folder and rename it to FreeBSD.
Note: The two files can have any name you wish, but they should not contain any dots (except one dot for the extension) and the two filenames must be identical.
You should now be able to select the .imgPTN file and switch to the CSM menu.
In the CSM menu, choose the ‘Boot to FreeBSD on 3rd partition (MBR mode)’ menu option.
Set a default menu option+timeout in the CSM Menu
Boot to the CSM menu and use the ‘Set default menu entry and timeout’ menu entry in the CSM menu.
Or you can manually edit the \e2b\menu_defaults.txt to choose menu #4 and set a timeout value or 12 seconds: e.g.
set dask=4
default 4
set task=12
timeout 12
FreeNAS and GhostBSD ISOs
MBR booting only. This procedure also worked for FreeNAS and GhostBSD11.1-mate-amd64.iso.
1. Download FreeNAS-11.1-U6.iso – rename it to FreeNAS11.ISO to leave only one dot in the filename.
2. Create an empty folder on your PC Desktop named FreeNAS11.
3. Use 7Zip to extract the \boot folder from the ISO to the .\FreeNAS11 folder so that you now have a .\FreeNAS11\boot folder and sub-folders.
4. Download the grub2_for_imgPTN_v1.zip file – extract the g2ldr file and copy it to the .\FreeNAS11 folder.
5. Drag-and-Drop the FreeNAS11 folder onto the MPI_FAT32 Desktop shortcut to make a FreeNAS11.imgPTN file.
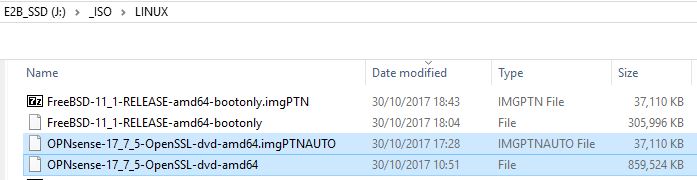
6. Copy the FreeNAS11.imgPTN file and the FreeNas11.ISO file to the \_ISO\LINUX folder on your E2B drive.
7. Rename the FreeNAS11.ISO file to FreeNAS11 (remove the .ISO file extension).
\_ISO\LINUX\FreeNAS11.imgPTN (approx 78MB)
\_ISO\LINUX\FreeNAS11 was the whole .ISO file (name must match .imgPTN file and should not contain any dots)
MBR-boot to the .imgPTN file and from the CSM menu choose the g2ldr menu option.
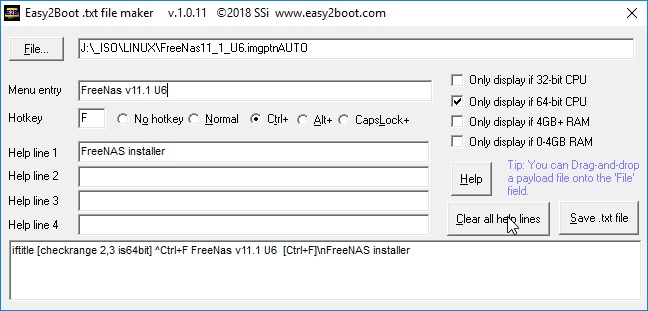
If the ISO is a 64-bit-only version, use a file extension of .imgPTNAUTO64 so that it is only listed on systems with 64-bit CPUs.
If the file name contains a dot, then both files will be listed in the Linux menu, so ensure there are no dots in the file name. If you really want to have dots in the menu entry, add a .txt file using \_ISO\Txt_Maker.exe.
pfSense v2.4 UEFI booting
You can find instructions at the end of this blog post.
The same procedure may also work for other memstick images which contain multiple images for multiple partitions.
Note that you must first MBR-boot to the CSM menu before UEFI-booting will work.