The first menu item (usually menu item 0) in the Main menu allows you to set a default menu item in the Main menu that will be automatically selected when E2B boots.
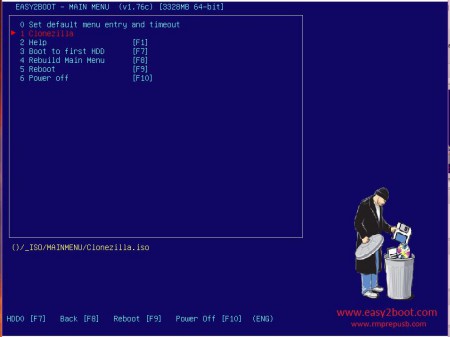
You can also set a timeout in seconds, so that the default menu entry will auto-run after a number of seconds. This menu entry is determined by the standard E2B file \_ISO\MAINMENU\$$$SetDefaultMenu.mnu which is usually always enumerated first by E2B, and so appears as the first menu item 0. Do NOT delete this file.
Table of Contents
Auto-run any payload file
If you have a payload file that is in another menu folder, then you can create a .mnu file for it and place the .mnu file in the \_ISO\MAINMENU folder. e.g. If you have \_ISO\LINUX\Ubuntu.iso which you want to automatically run, create a .mnu file. I suggest using a name that begins with $$ so that it’s menu number does not change if you add more payload files – this way it will always be menu item 1 ($$$SetDefaultMenu.mnu is menu item 0):
\_ISO\MAINMENU\$$A_MyDefault.mnu
title Ubuntu\n For default selection
/%grub%/QRUN.g4b /_ISO/LINUX/Ubuntu.iso
boot
If you want the menu entry in the Main menu to be ‘invisible’ (so that there will be a blank line in the menu), do not specify any text for the title and do not add the ‘boot’ line…
title \n Ubuntu.iso will auto-boot
/%grub%/QRUN.g4b /_ISO/LINUX/Ubuntu.iso
For other .mnu examples, such as for a Windows Installer ISO, see the \_ISO\docs\Sample mnu Files folder.
Note: If using a Virtual Machine, setting a Main menu default will not be remembered unless the VM has full write access to the USB drive. Using RMPrepUSB+QEMU (F11) or VBox+VMUB will work. Using VMWare+Plop or QEMU_MENU_TEST (run as admin).cmd, etc. will not work correctly.
Remove\move the ‘Set default menu entry and timeout’ menu entry
To prevent the user from using the ‘ set default’ menu, it can be removed from the Main menu using a setting in the \_ISO\MyE2B.cfg file:
set DEFMENU=0
Permanently preset:
You can preset the default menu entry and timeout values (instructions are also in the Sample_MyE2B.cfg file):
Create a new \_ISO\menu_defaults.txt file (this example sets the 2nd menu item as the default with a 10 second timeout)
# set the default entry and timeout (debug 0 prevents menu item number at top right from being displayed) default 1
timeout 10
debug 0
Moving the entry:
If you want the ‘Set default menu entry and timeout’ menu entry to be in another menu (e.g. Utilities Menu) or at the bottom of the Main Menu:
1. Add ‘set DEFMENU=0’ to your \_ISO\MyE2B.cfg file to suppress the E2B menu entry.
2. Copy the \_ISO\MAINMENU\$$$SetDefaultMenu.mnu file to the \_ISO\UTILITIES folder (or whatever menu you want it in)
3. Edit the new \_ISO\UTILITIES\$$$SetDefaultMenu.mnu file to remove the ‘if not exist DEFMENU && ‘ text so that:
iftitle [if not exist DEFMENU && if exist /%grub%/menu_defaults.txt] $$STRh0MD
now becomes
iftitle [if exist /%grub%/menu_defaults.txt] $$STRh0MD4.
Change the name of the $$$SetDefaultMenu.mnu file to (say) ZZsetDefaultMenu.mnu if you want it listed at the bottom of the menu.
If you want to change the position of the ‘set default’ menu entry in the Main Menu – copy and rename and edit the new .mnu file as above, but use the \_ISO\MAINMENU folder instead of the UTILITIES folder. If you update your USB drive to a later version of E2B, your menu will not be affected.
Set defaults for sub-menus
It is possible to make a small .mnu file which selects a default sub-menu entry for each sub-menu.
In this way you can configure E2B to automatically boot to any menu entry in any sub-menu.
You can set a timeout for each sub-menu too. This trick uses a .mnu file which MUST be enumerated first in each sub-folder and therefore should have a name which is enumerated first, such as $$$$Default.mnu.
Example
For example, suppose you want the LINUX sub-menu to always select the 4th menu item when the LINUX sub-menu is loaded, and you want the WINPE sub-menu to select the 2nd item with a timeout of 10 seconds when it is selected:
\_ISO\LINUX\$$$$Default.mnu
default 3
\_ISO\WINPE\$$$$Default.mnu
default 1
timeout 10
If you set the Main menu default to run the WINPE sub-menu entry with a timeout (e.g. 3 seconds), then E2B will boot first to the Main menu and then to the WINPE sub-menu and then run the 2nd entry in that menu after 10 seconds. Note however, that if you add any more payload files, it could affect the menu numbering!
Hide the Main Menu
If you set a default Main menu item + timeout, you can make the E2B menu behave as follows:
- Boot to E2B – Main menu files are enumerated
- Background wallpaper is displayed but no Main Menu entries are displayed
- If user presses ‘special key’ (e.g. ESC or F10) before timeout (and enters correct password) then Main menu is displayed
- After timeout, the selected Main menu item is automatically run (e.g. an ISO can be run or the Antivirus Menu is loaded)
- The user can press F8 to load the Main Menu
This means that the user will not see all the Main Menu items displayed when it first loads.
How to set up the hidden Main Menu
1. Add a \_ISO\MAINMENU\!!CONFIG\hide.mnu file containing:
#Special key is F10
hiddenmenu –chkpass=0x4400
or
#Special key is ESC
hiddenmenu –chkpass
2. Set a default entry and timeout using the Main Menu #0 entry
3. The default password is set by the pwd variable and is ‘easy2boot’. If you don’t want a password use:
set pwd=
in your \_ISO\MyE2B.cfg file.
You can also set up a Guest Menu system (guest user can only access a cut-down menu).