Table of Contents
Hack Windows account (UtilMan)
E2B contains some scripts in the \_ISO\docs\utilman folder. These .cmd scripts can be used to gain access to an unencrypted Windows system even if it uses an online (Microsoft) account. This process automates and speeds-up the well-known hack of replacing the UtilMan.exe and SetHC.exe files with the cmd.exe file to allow administrator access to the command prompt (E2B v2.06+ also patches magnify.exe).
This process does not work on BitLocker-encrypted volumes.
Online Microsoft account passwords cannot be changed offline because the password is held on the Microsoft servers. If you try to reset the account password then you will need to have access to that same email account to receive the security code.
You can however delete any account and create new user accounts.
Requirements
- A recent versions of E2B+agFM
- Standard Microsoft Windows 10 Home or Professional Install ISO – should also work with WinPE ISOs or windows recovery .wim file.
- The target Windows OS must have OS files in the standard \Windows folder (Vista/7/8/10, etc.). (or else you will need to edit the .cmd scripts)
- The target system must be able to boot from USB and the Windows volume must not be encrypted (no BitLocker).
Can hack multiple Windows OS on all disks\partitions in a system incl. Secure UEFI.
WARNING: Due to Windows Fast Startup/Fast Boot – always first boot to the Windows Login screen and then click Restart (or SHIFT + Shutdown) and then boot to a different OS or WinPE/E2B before changing the system files. Never try to hack a Windows system that has been simply ‘ShutDown’ by the user because it may be in a semi-hibernation mode and any file/registry changes you make offline could cause file corruption!
Also – always ensure Windows is not in the middle of a Windows Update cycle (this can corrupt Windows if you interrupt it!). Restart Windows several times until you do not see any ‘Update in progress’ messages.
Method
If you do not have a bootable Windows ISO on the E2B drive, see the bottom of this page to see how to boot to the WinRE image on the internal hard disk. If the system has Secure Boot enabled, you can UEFI64 Secure Boot using E2B+agFM.
A Windows 10 Install ISO is recommended because it should work on any Windows XP/7/8/10 system. You could use a bootable Win8.1 or WinPE ISO such as Gandalf’s PE or ChrisR’s Win10PESE ISOs.
1. Boot to the target system’s Windows OS
- choose (Power icon) – hold down the SHIFT KEY and at the same time click ‘Restart‘
- select Troubleshoot – Advanced options – Startup settings – Restart
- reboot to E2B Menu on the USB drive or reboot the agFM UEFI menu system (Secure Boot should also work)
- select Windows Install Menu – Windows 8 or 10 – select ISO
- Choose the ‘Hack Windows (UtilMan.exe).XML‘ option (see first option below).


Note: Windows PE should automatically assign each hard disk volume a drive letter. If no Windows volumes are found, check using DiskPart that the target volume has a drive letter assigned to it.
If you boot to a WinPE OS, run “\_ISO\docs\UtilMan\UtilMan1PE_Patch.cmd” from the E2B USB drive to patch the files. Then reboot and goto step 3,
2. Create a new account
After the files have been patched, boot to Windows and quickly press WIN+U (the Windows key and the U key) at the Windows login screen (or click on the Accessibility icon or tap the SHIFT key five times) to gain access to the command shell. If the cmd window does not appear, click on ‘Magnifier‘.
Then quickly type 2 and press ENTER to create a new local administrator account.
You may have only 30 seconds to do this before Windows Defender loads and prevents the hack.
If you have problems, try booting in Safe Mode.

Tip 1: You may need to reboot to see the new account – to save rebooting, a quicker method is to click on ‘Sleep’ and then wake the computer up again.
Tip 2: E2B v1.A9+ will also launch control userpasswords2 to allow you to change offline passwords (you must tick the ‘Users must enter Username and Password to use this computer’ first). This avoids the need to create a new account.
Win8/10 2018-09 and later: The cmd shell may disappear within 30 seconds if you are not quick enough!
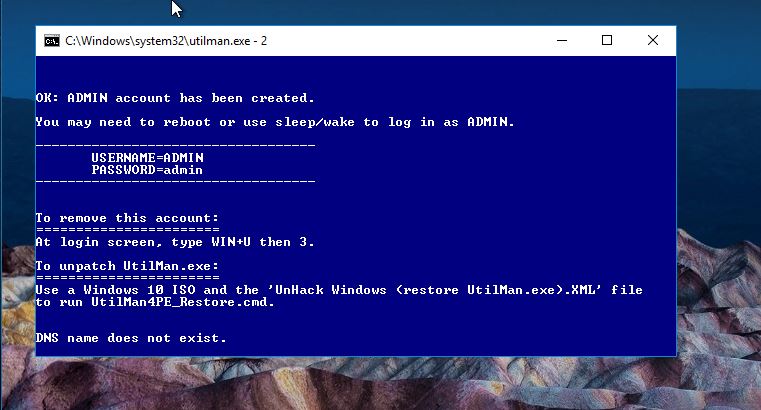
You can now reboot and login as ADMIN9 (password = admin) – Windows will set up a new account for you.
Note: later versions of E2B name the account ADMIN9 instead of ADMIN.

Now you can gain access with Administrator privileges, access files and change passwords, etc. by logging into the new account (password=admin).
3. Remove the Admin9 account
When finished, repeat step 2 (boot and press Win+U) but then but type 3 instead of 2 and press ENTER to remove the ADMIN (ADMIN9) account.
This may also restore the original files by running SFC (but due to Windows bugs, it does not always work!).


Check the size of the three files and run Step 4 if they are all the same size!
If the screen is green, then the files have been restored correctly, but you can run Step 4 to delete the C:\Users\ADMIN(9) folder which is now unused.
If WIN+U does not work because it has been removed bit Windows Defender, remove the account by logging into another account which has Administrator rights and run an admin command shell and type 3 to remove the ADMIN account (it uses the command NET USER ADMIN /del).
Then reboot and follow Step 4 below.
4. Restore and remove the hacked files
Repeat step 1 (Safe mode is not required) but choose the ‘UnHack Windows (remove UtilMan.exe).XML‘ file to remove the hack and restore the original files.
You can also choose to delete the old \Users\ADMIN folder too.

This will restore the original utilman.exe and sethc.exe files and check/repair them with System File Checker (SFC).
For more details, read the ReadMe.txt file in the \_ISO\docs\utilman folder and this blog post.
If you are UEFI-booting from a .imgPTN file, you can copy the \_ISO\docs\utilman folder to inside the image (see section below), but MBR-booting from an ISO will also apply the patch correctly.
If you don’t usually carry a Windows 8/10 Installation ISO on your E2B drive or a suitable WinPE ISO, you can download a 32-bit Windows 10 Installation ISO and use an ISO editor to delete the large \Sources\Install.wim file to reduce it’s size. A 32-bit ISO will patch both a 64-bit Windows OS and a 32-bit Windows OS.
Note: The XML files contain a Windows Home generic Product Key – if you see a ‘licence error’ message, copy the file and edit it so that it contains a generic product key which matches your particular Windows ISO.
UEFI-booting
If you can boot from an ISO in MBR-mode, you should be able to patch any (MBR or UEFI) Windows OS.
If your target system can ONLY UEFI-boot you can UEFI-boot to agFM the process is identical – just select the Windows ISO and XML file using the agFM File Manager menu system.
OR …
- Switch to a WinPE UEFI-bootable .imgPTN file (e.g. Strelec WinPE, ChrisRPESE, Gandalf or a Microsoft Windows Installer, etc.) – Do NOT boot to a WindowsToGo OS.
- Copy the \_ISO\docs\UtilMan folder to the USB drive – e.g. \UtilMan.
- Boot the target Windows system and click ‘Restart’ then UEFI-Boot to WinPE from E2B and ensure that all the OS drives that you wish to ‘patch’ have a drive letter assigned. Some WinPE’s such as Sergie Strelec may not assign drive letters to other volumes.
If you don’t want to patch some OS volumes, then ‘offline’ them or remove their drive letter (e.g. using diskmgmt.msc or DiskPart). - Run \Utilman\UtilMan1PE_Patch.cmd to patch all volumes with a drive letter that have a Windows OS.
- Now remove the USB drive and boot to the Windows OS as usual.
- Follow Steps 2 and 3 in the Method section above.
- To remove the patch, UEFI-boot from the E2B USB drive again, ensure the drive(s) you wish to unpatch have a drive letter assigned.
- Run \UtilMan\UtilMan4PE_Restore.cmd to unpatch the OS.
Tip: If your E2B USB drive is a Removable type, you could add a suitable \Unattend.XML file to the root of the image inside the .imgPTN file so that it automatically runs \Utilman\UtilMan1PE_Patch.cmd. If the USB drive is a Fixed-disk type, you will need to add the XML file into the \sources\boot.wim file. I cannot give exact instructions because it depends on what WinPE image you are using.
Boot to WinPE without needing any ISO
If you want to hack a Windows 8 or 10 system, you do not even need a Windows ISO on the E2B drive!
We can boot to the system’s own WinPE Recovery .wim file to boot to WinPE – it should already be on the Windows system disk.
1. Copy \_ISO\docs\Sample mnu files\Windows\Boot_Recovery_WIM.mnu to the \_ISO\MAINMENU folder
2. Boot to E2B and run the ‘Boot to Windows Recovery’ menu option. If there is more than one Windows OS, any one will do.
If the system is set to UEFI-boot only, you will need to change the BIOS settings to enable MBR\Legacy\CSM boot.
3. Pick the correct Recovery option to get to the Command console (this varies depending on Windows version).
4. Run \_ISO\docs\UtilMan\Utilman1PE_Patch.cmd from the E2B USB drive
Note that this will patch ALL Windows OS’s on all disks in the system.
5. Now you can boot to Windows and run 2.cmd as detailed above
6. To undo the changes, boot to Windows and run 3.cmd as detailed above
7. Finally, boot to the Recovery WinPE console again and run \_ISO\docs\UtilMan\UtilMan4PE_Restore.cmd to tidy up.
Note: To boot to the Windows Recovery wim file, a Windows 8.1 or compatible version of bootmgr is needed on the E2B USB drive. E2B will warn you if it is missing.
“The User Profile Service service failed the sign-in.” “User profile can not be loaded”
If you’ve encountered the ‘User Profile Service failed the logon’ error in Windows 10, copy the ‘C:\Users\Default’ folder from a second, non-problematic PC over to your problem PC using a USB drive and copy it to the same location. Rename the existing folder on your problem PC to something else first, just in case you ever need to revert back for any reason.
Tip: To access the ‘Default’ folder on your second PC you’ll need to turn on hidden files by clicking ‘View’ in the folder toolbar and selecting ‘Hidden items’.