Table of Contents
Automating Windows Installs from .imgPTN files
You can UEFI or Legacy Boot to a Windows Install file using E2B or agFM and pick any XML file as an unattend file, however for reliable Secure Booting, you may find that converting the Windows ISO files to a .imgPTN (or .imgPTN23) is more reliable than using agFM.
When you convert a Windows Install ISO to a .imgPTN file and boot from the .imgPTN partition (via the CSM Menu or UEFI booting), Windows will see a ‘flat-file’ structure, with all the folders and files directly accessible in the .imgPTN partition(s).
E2B eBooks are now available (including a complete course on making a multiboot USB drive and an eBook on Installing Windows). If you are creating a .imgPTN file because you need to UEFI-boot, you can instead simply directly boot to any Windows Install ISO by UEFI-booting to agFM first – you can select the XML file after selecting the Windows ISO file (see eBook #4). SDI_CHOCO is also supported.
WARNING: If you add an XML file which automatically partitions and formats a drive, then as soon as you UEFI-boot, it will destroy the disk contents of any system you connect it to. In particular, if you UEFI-boot from a .imgPTN file there will be no menu or other warning at all! Be careful that you don’t just pick up an E2B USB drive in this state and just UEFI-boot from it – it may wipe your system disk!I You can use the Auto.cmd method #3 below, to avoid this problem (or use an Image Index value of 99 so that you are required to press a key)!
When you boot from the E2B .imgPTN partition, Windows will behave in the same way as if you just copied the files to a USB bootable drive.
In particular, Windows 8/10 will usually ask you for a Product Key.
You can automate the entry of a Product Key and many other Windows settings by adding an Autounattend.xml file to the image as follows:
To make a XML file – read my blog page here.
SDI_CHOCO
You can use the E2B SDI_choco feature for automatic driver, application install and Windows Updates.
How Windows Install .imgPTN file work:
- Setup.exe automatically loads the XML file or the XML file path was specified.
- XML file tells WinPE to run \e2b\stage1.cmd which copies stage2.cmd and other files to the C: drive.
- On reboot, stage2.cmd is run and it switches the partition back to the E2B partition.
- stage2.cmd also contains the name of the CONFIGURATION SET script – e.g. set CONFIG=fred.cmd
- \_ISO\WINDOWS\INSTALLS\CONFIGS\fred.cmd is run and copies the files from \_ISO\WINDOWS\INSTALLS\CONFIGS\FRED\ folder to C: drive
- Execution now continues using the files which were copied to the C: drive.
To use a different configuration set – e.g. FRED, you need to:
- Ensure the XML file contains an entry to run \e2b\stage1.cmd
- Ensure the \e2b\stage2.cmd file has the CONFIG variable set to FRED.cmd (set CONFIG=FRED.cmd)
- Ensure \_ISO\WINDOWS\INSTALLS\CONFIGS\FRED.cmd exists (a copy of SDI_CHOCO.cmd)
- Ensure the folder \_ISO\WINDOWS\INSTALLS\CONFIGS\FRED\ exists (copy of SDI_CHOCO folder)
- Create\Modify the mystartup.cmd and any other myxxxx.cmd files you require in the \_ISO\WINDOWS\INSTALLS\CONFIGS\FRED\ folder (use Sample_myxxx.cmd files as template).
Method 1. If your E2B USB drive is a Removable Flash drive
Create an AutoUnattend.xml file and copy it to the root of the image (i.e. inside the .imgPTN file). You must first select the .imgPTN file using \_ISO\SWITCH_E2B.exe or boot to E2B, e.g. Run E2B and select the .imgPTN file and run it so that you see the CSM Menu displayed – then unplug the E2B USB drive and connect it to a Windows system. Then copy the AutoUnattend.xml file to the root of the USB drive.
This also works for WIndows 10 on a Fixed disk USB drive too.
WARNING: If your XML file automatically partitions and formats the drive, if you UEFI-boot, it will immediately wipe your hard disk! See also Method 3 below.
Method 2. If your E2B USB drive is NOT a Removable Flash drive
Note: recent versions of Windows 10 (e.g. 1803+) will detect a \AutoUnattend.xml file in the root of a ‘Fixed-disk’ type of USB drive. So try Method 1 first as it is easier!Windows 7/8 and early 10 will only automatically load a \AutoUnattend.xml file from a Removable USB flash drive – an easy way to be able to use an E2B .imgPTN file from a hard disk, is to simply add a small Removable USB flash drive that contains your \AutoUnattend.xml file.
Note: MPI 0.068+ – if you boot to the CSM Menu (MBR mode), the CSM menu will copy the contents of the \AutoUnattend.xml file to the \AutoUnattend.xml file on your WinHelper USB drive. So all you need to do is place the \AutoUnattend.xml file in your .imgPTN partition and connect a WinHelper USB drive. If you want to UEFI-boot however, you must first boot to the CSM menu (do NOT use a VM), or ensure that the correct \AutoUnattend.xml file is on the WinHelper drive.
WARNING: Note that if you UEFI-boot from the E2B drive in this state (switched to .imgPTN partition) on ANY UEFI-system, there will be no warning whatsoever and the target hard disk will immediately be wiped and formatted, if your XML is set up to do this! If this is too cumbersome or you don’t want to use a second flash drive, then you must modify the boot.wim file. This is the best solution for automated UEFI installation.
Tip: Use Split_WinISO.exe and Method 3 below – this automates the modification of the boot.wim file.
2a. Use GImageX to Mount the \sources\boot.wim file – usually a boot.wim will contain more than one image and image #2 is the one that we need to select.
You need to make an empty folder on your Windows drive in order to mount the image from the boot.wim file – I used F:\mount1
Click Mount to mount the image below the Mount Point folder.
An alternative tool is MagicIso (but it is not free).

You should now see that all the files under F:\mount1 are the files that are inside the boot.wim image.
Image #2 is usually the Setup image inside the boot.wim file.
Note: Ensure there is enough spare space on the Source drive for another copy of the boot.wim file.
Tip: If the boot.wim file will not mount, create a new Mount Point folder – sometimes the previous empty mount point folder will refuse to work, even after a reboot!
2b. Copy your AutoUnattend.xml file to the root of the mounted folder (e.g. F:\mount1\AutoUnattend.xml or F:\mount1\Unattend.xml)
Note: if you XML file does not contain a WindowsPE pass – name the file \Unattend.xml.
e.g. to just include a product key:

2c. Tick Commit Changes, click on the entry in the lower box to highlight it and then Unmount to save the changes to boot.wim This method requires that you edit the boot.wim file every time you make a change.
Tip 1: An easy way to create an AutoUnattend.xml file is to use the Windows Answer File Generator and the XMLtoE2B.exe converter utility.
Tip 2: If you have named the file AutoUnattend.xml and it is not detected by Setup, rename it to Unattend.xml.
WARNING: If your XML file partitions and formats the drive, if you UEFI-boot, it will immediately wipe your hard disk!
Method 3. Easy to change AutoUnattend.xml (select from a number of different XML files)
Tip: See Split_WinISO section below for an automated way to create .imgPTN files – Steps 1 – 4 below (recommended).
This process is a bit more complicated than Method 2 above, but it allows you to easily change the \AutoUnattend.xml file which is located in the root of the image (i.e. it is not inside the \sources\boot.wim file) or we can even allow the user to select from a range of XML files.
This method causes Windows Setup to search for \auto.cmd and run it. This allows us specify any XML file we like.
This method was tested using a Murphys AIO – Win7SP1_5in1-x86-Aug2015-en-US.iso (Size: 3.57 GB SHA-1: 4DA0D82FDF22222BB018C61EA5DB743EC7974AA8).
1. Mount the boot.wim file as in method 2 above using GimageX (make sure you select the Setup image – usually #2 – inside the boot.wim file)
2. Copy in the winpeshl.ini and mysetup.cmd file to the windows\system32 folder of the mounted boot.wim image – e.g. F:\mount1\windows\system32
The download for these ‘Win_Auto_Install_Files’ is below. It is best to copy the \sources\boot.wim file to your Windows hard disk before you mount it, then modify it and delete the one on the USB drive and replace it with the new one.
3. Commit the changes and Unmount boot.wim (close ALL Explorer windows first or you may get an error!)
Note: if you have problems with unmounting the boot.wim, check it is not corrupt by remounting it and ensure that the new files are still present. You may need to make a new Mount folder (e.g. \mount2) or reboot your Windows system before it will remount – it is quite temperamental and does not always work after a few times!
4. Copy the Auto.cmd file and your AutoUnattend.xml file to the root of your E2B USB drive (that is the image partition which should have \sources folder and \boot folder)
We now need to add\change XML files(s) and edit the auto.cmd file…
E2B .imgPTN partition
\AutoUnattend.xml
\Auto.cmd
\Sources\boot.wim <<< contains winpeshl.ini and mysetup.cmd in the \windows\system32 folder.
You can now edit or replace the sample \AutoUnattend.xml as desired.
Tip: in case of trouble, look in the log file X:\Windows\Panther\Setupact.log for ‘Logging new OS to BB’ and the next few lines after that – it should report a AutoUnattend.xml file was found. If not then look in X:\Windows\Setupact.log.
You can even prompt the user (using auto.cmd) and ask them which one of several unattend.xml files they want to use if you change the script in the \Auto.cmd file.
I highly recommend using a auto.cmd file to prompt the user, even if you only have one XML file, because it also prevents you from accidentally booting from the USB drive and immediately wiping the system’s internal hard disk without warning!
Each xml file can have different Product Keys and other settings.
E2B .imgPTN partition
=============
\AutoUnattend.xml (to be edited)
\AutoUnattendP.xml (not supplied)
\AutoUnattendBlank.xml (can be used for normal install)
\Auto.cmd (modified as below)
\Sources\boot.wim <<< contains new winpeshl.ini and mysetup.cmd in the \windows\system32 folder
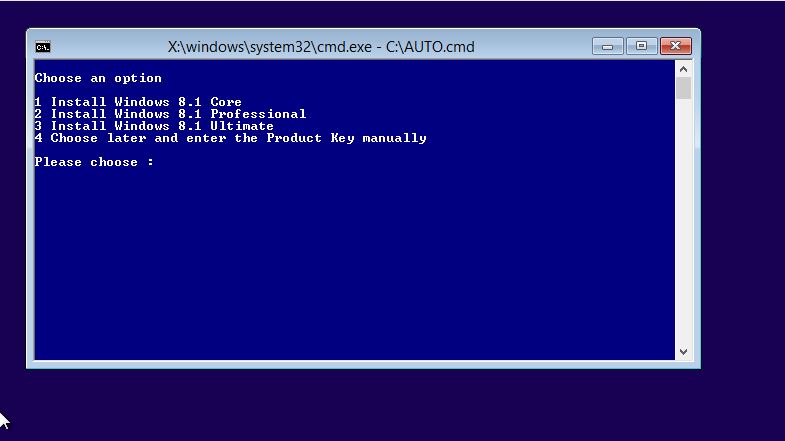
\Auto.cmd (replace the contents of Auto.cmd with these lines)
@echo off
 color 1f
 FOR %%i IN (C D E F G H I J K L N M O P Q R S T U V W X Y Z) DO IF EXIST %%i:\Auto.cmd set UNAT=%%i:
 if not exist %UNAT%\Auto.cmd echo Could not find Auto.cmd & pause & exit
 :loop
 cls
 echo.
 echo Choose an option
 echo.
 echo 1 Install Windows 8.1 Core
 echo 2 Install Windows 8.1 Professional
 echo 3 Choose later and enter the Product Key manually
 echo.
 set ask=
 set XML=
 set /p ask=Please choose :
 if "%ask%"=="" goto :loop
 if "%ask%"=="1" set XML=AutoUnattend.xml
 if "%ask%"=="2" set XML=AutoUnattendP.xml
 if "%ask%"=="3" set XML=AutoUnattendBlank.xml
 if "%XML%"=="" goto :loop
 x:\setup.exe /unattend:%UNAT%\%XML%
 exit
You can edit auto.cmd to add more XML files, e.g. Win8 Core MBR, Win8 Pro MBR, Win8 Core UEFI, Win8 Pro UEFI. Note that the file \e2b\stage2.cmd determines which config set is run.
The default \e2b\stage2.cmd file has a config set of set CONFIG=SDI_CHOCO.cmd.
If you want to use a different config set, you must use a different stage2.cmd file by copying a different file to \e2b\stage2.cmd. Here is one method:
AutoUnattend.cmd, AutoUnattendP.cmd and AutoUnattendBlank.cmd should have different CONFIG values and be located in the \e2b folder.
@echo off
color 1f
FOR %%i IN (C D E F G H I J K L N M O P Q R S T U V W X Y Z) DO IF EXIST %%i:\Auto.cmd set UNAT=%%i:
if not exist %UNAT%\Auto.cmd echo ERROR: Could not find Auto.cmd & pause & exit
:loop
cls
echo.
echo Choose an option
echo.
echo 1 Install Windows 8.1 Core
echo 2 Install Windows 8.1 Professional
echo 3 Choose later and enter the Product Key manually
echo.
set ask=
set XML=
set /p ask=Please choose :
if "%ask%"=="" goto :loop
if "%ask%"=="1" set XML=AutoUnattend
if "%ask%"=="2" set XML=AutoUnattendP
if "%ask%"=="3" set XML=AutoUnattendBlank
if "%XML%"=="" goto :loop
if not exist %UNAT%\e2b\%XML%.cmd echo ERROR: %UNAT%\e2b\%XML%.cmd does not exist! & pause
copy %UNAT%\e2b\%XML%.cmd %UNAT%\e2b\stage2.cmd
x:\setup.exe /unattend:%UNAT%\%XML%.xml
exit
Split_WinISO will automatically make a boot.wim file for you and insert the auto.cmd file and sample XML files (steps 1 – 4) – see below for details.
Note 1: We do not have to use Setup.exe and XML files to install Windows from the Auto.cmd file. Instead you could use a combination of Diskpart and Dism to partition and install Windows using scripting – see this page for examples.
Note 2: stage2.cmd will run \MyConfig.cmd and \e2b\MyConfig.cmd if they exist.
You can change the CONFIG file that is used by creating this file, e.g. \MyConfig.cmd
set CONFIG=fred.cmd
AUTO.cmd
@echo off
color 1f
FOR %%i IN (C D E F G H I J K L N M O P Q R S T U V W X Y Z) DO IF EXIST %%i:\Auto.cmd set UNAT=%%i:
if not exist %UNAT%\Auto.cmd echo Could not find Auto.cmd & pause & exit
if exist %UNAT%\MyConfig.cmd del %UNAT%\MyConfig.cmd > nul
if exist %UNAT%\e2b\MyConfig.cmd del %UNAT%\e2b\MyConfig.cmd > nul

:loop
cls
echo.
echo Choose an option
echo.
echo 1. Customer - No Office
echo 2. Customer - Office 2013
echo 3. Customer - Office 2016
echo 4. Customer - All apps
echo 5. Home - Own
echo 6. Home - Kids
echo 7. Home - MMServer
echo.
set ask=
set XML=
set /p ask=Please choose :
if "%ask%"=="" goto :loop
if "%ask%"=="1" set XML=ProCustomer.xml
if "%ask%"=="2" set XML=ProCustomer.xml
if "%ask%"=="3" set XML=ProCustomer.xml
if "%ask%"=="4" set XML=ProCustomer.xml
if "%ask%"=="5" set XML=Home.xml
if "%ask%"=="6" set XML=Home.xml
if "%ask%"=="7" set XML=MMServer.xml
if "%XML%"=="" goto :loop:: ensure stage2.cmd has name of the config file we want it to use
if "%ask%"=="1" echo set CONFIG=NoOffice.cmd> %UNAT%\MyConfig.cmd
if "%ask%"=="2" echo set CONFIG=Office2013.cmd> %UNAT%\MyConfig.cmd
if "%ask%"=="3" echo set CONFIG=Office2016.cmd> %UNAT%\MyConfig.cmd
if "%ask%"=="4" echo set CONFIG=AllApps.cmd> %UNAT%\MyConfig.cmd
if "%ask%"=="5" echo set CONFIG=Own.cmd> %UNAT%\MyConfig.cmd
if "%ask%"=="6" echo set CONFIG=Kids.cmd> %UNAT%\MyConfig.cmd
if "%ask%"=="7" echo set CONFIG=MMServer.cmd> %UNAT%\MyConfig.cmd
x:\setup.exe /unattend:%UNAT%\%XML%
See eBook #2 for details.
The ‘bitness’ (32-bit or 64-bit) of the OS can be determined from the %PROCESSOR_ARCHITECTURE% environment variable.
The boot mode (MBR or UEFI) can be determined under WinPE as shown here.
wpeutil UpdateBootInfo > nul
for /f "tokens=2* delims=     " %%A in ('reg query HKLM\System\CurrentControlSet\Control /v PEFirmwareType') DO SET Firmware=%%B
:: Note: delims= is a TAB followed by a space.
if "%Firmware%"=="0x1" echo WinPE booted in BIOS mode.&& set BOOTMODE=MBR
if "%Firmware%"=="0x2" echo WinPE booted in UEFI mode.&& set BOOTMODE=UEFI

#find type of CPU
set CPU=32
wmic cpu get datawidth | find "64">nul&& set CPU=64
Modifying XML files
If you run the auto.cmd script, you could request a Computer Name and a User Name from the user and then modify the XML file before using it to run Setup.exe. In this way, you can use the same XML file to set up different computers. I suggest you download and add the JREPL.BAT file to the root of the FAT32 volume (inside the .imgPTN file). It can be used as follows:
set /p MYUSER=Account Name:
set /p MYCNAME=Computer Name:
copy %XML% NEWXML.xml
cmd /c jrepl.bat "UNAME" "%MYUSER%" /f NEWXML.XML /o -
cmd /c jrepl.bat "PCNAME" "%MYCNAME%" /f NEWXML.XML /o -
x:\setup.exe /unattend:%UNAT%\NEWXML.XML
This assumes that the original XML file %XML% has ‘UNAME’ and PCNAME already in it.
cmd /c is used as jrepl.bat seems to change behaviour with pause or keyboard input otherwise.
Use Split_WinISO.exe
Chandra’s Split_WinISO.exe utility can be used to automatically add the required files into boot.wim (image #2) and it will also split large WIM\ESD files and add a sample auto.cmd plus XML files too!

- Split_WinISO is already in the MPI folder (MakePartImage toolkit download)
- Run Split_WinISO.exe, select an ISO file (ensure that at least one Install.WIM\ESD has been found).
Tip: Ensure there are no spaces or strange characters in the path or ISO name! - If the Install.ESD\WIM is over 4GB, use the CONVERT button – otherwise use the MPI button. You will be prompted with a few questions and then the .imgPTN file will be made.
Say ‘Yes’ when asked if you want to inject the winpeshl.ini and MySetup.cmd files into the boot.wim image #2 (see screenshot above). This also adds a sample auto.cmd file. This is useful if you want to use various XML files (e.g. for a choice of various SDI_CHOCO XML files or other types of XML files). Now just switch to it (using SWITCH_E2B.exe) and edit the auto.cmd file as required and add any XML files to the partition volume that you need. Note that you should use standard Microsoft Windows ISOs.
AIO ISOs
If you accept the boot.wim modification (for winpeshl.ini and auto.cmd, etc.) then All-In-One ISOs may not work (they may not use Image #2 or they may not run winpeshl.exe). So for AIO ISOs, say No to the boot.wim modification prompt.
Tips on making an AutoUnattend.xml file
A good start to making an automated install is to use the handy online xml file generator WAFG for Win7/8/8.1/10 here. This generates an xml file that can be used on both 32-bit and 64-bit versions – there are separate entries for each of the two CPU types (i.e. there are two entries for every setting so make sure you change both occurrences!). Note that the install can be fully unattended and will just wipe your internal hard disk without asking! The WAFG XML file however needs tweaking before it will work with E2B (or a multiple-image Install.wim). You can use the XMLtoE2B.exe converter utility to make the WAFG XML file fully automated and change it to use GPT partitions for UEFI installs.
Editing the XML file without using XMLtoE2B
XMLtoE2B makes converting the WAFG XML file for use with E2B really easy, but if you don’t have it then read the instructions below to see how to manually edit an XML file. Detailed instructions can be found in my blog article here. Once you have made the xml file using Windows AFG and try to use it, you will find that it still initially prompts the user for which version of Windows to use (e.g. Starter, Home, Basic, Pro, Ultimate, etc.). To prevent this, you need to add the following section shown in red (the black text should be already present:

Fig. 1 Add this section to avoid being prompted for which version of Windows you want
Note that the exact name (e.g. “Windows 7 PROFESSIONAL”) of the Windows version can be found using 7zip and examining the 1.xml file shown inside the root of the \sources\Install.wim file. The top xml file shows you which versions are present inside the Install.wim file and the correct spelling.
You will need to insert the red text twice, because the OSImage section occurs twice – once for 32-bit and once for 64-bit (amd64). You will also need to specify a Product Key that matches the version you specify (again, it occurs twice). A generic key can be used for installation purposes. The Windows utility XMLtoE2B.exe will convert the output of the Windows Answer File Generator to the correct format for an automated install.
It is available on request, to anyone who has made a donation of £10 or more. I will include a licence file to make it fully functional. The \sources\ei.cfg file is ignored (if present).
If you want the user to be prompted to input their own ComputerName near the end of the installation, delete the two ComputerName lines (i.e. the word “ComputerName” should not be present anywhere inside the xml file) and make sure the SkipMachineOOBE setting is false in both places – otherwise a random name based on the UserName will be automatically chosen – e.g. User1-TGY347.

Fig.2 Delete completely the two ComputerName lines, if you want the end user to be prompted to enter a machine name (SkipMachineOOBE=false).
To enable the Administrator account, set the AutoLogon UserName to Administrator. If you do not add any User Accounts in the XML file, then you will be prompted to create a User Account at the end of the build unless you set SkipMachineOOBE to true.
Testing Automated Windows 8/8.1/10 MBR and UEFI installs using a Virtual Machine
When booting from an E2B USB drive on a real system, the Hard disk should be Drive 0.
Unfortunately, Virtual Box + DavidB’s VMUB utility can only boot from the USB drive as Drive 0, so we need to make sure Windows is installed to Drive 1 not Drive 0 (and that the XML file does not wipe Drive 0).
Also, the E2B USB drive will be seen as a ‘Fixed Disk’ in VirtualBox (even if it is really a Removable Flash drive)1. Create an XML answer file using WAFG+XMLtoE2B.exe (see here for details).
2. Edit the XML answer file using NotePad and change all occurences of DiskID 0 to 1 (or use one of the Disk1_VM_Only .diskcfg files when using XMLtoE2B).
3. Using MakePartImage, convert your Windows 8/8.1/10 Install ISO to a FAT32 partition image using the MPI_FAT32 shortcut. Copy it to \_ISO\MAINMENU on the E2B Drive.
4. Boot to E2B (e.g. using DavidB’s VMUB utiity) and run the Windows .imgPTN menu entry to get to the CSM menu – then exit (F10).
5. You should now see the contents of the .imgPTN partition on the E2B USB drive using Windows Explorer (e.g. \Sources folder)
6. Add the XML file to the root of the \Sources\boot.wim file as described above using GImageX (file must be called AutoUnattend.XML).
Note: if you want to be able to easily update the XML file in future or choose from a selection of XML files, refer to the ‘3. Easily changeable AutoUnattend.xml‘ heading on this page. For instance, you can have different XML files for Win8 Core, Win8 Pro, MBR and UEFI\GPT installs.
7. (optional) Boot to the E2B USB drive in MBR mode and switch back to the E2B menu. Then copy the .imgPTN file to your system hard drive – this is a backup file in case things go wrong!.
8. (optional) Boot to the E2B USB drive in MBR mode and select the .imgPTN file again. Quit at the CSM menu.
9. Now boot from the VM in UEFI mode or MBR\BIOS mode (32-bit or 64-bit) as required using DavidB’s VMUB utility. The install should proceed automatically to the virtual disk 1.
UEFI VM – When the installation completes do not reboot (otherwise the Windows Install will start again and wipe Drive 1!). You can now check the install worked as expected within Windows.
10a. MBR VM – When Windows reboots, press F7 in the CSM menu to boot from the virtual hard disk.
10b. UEFI VM – If you want to boot again to Windows on Disk 1, run Virtual Box manager and delete the E2B USB .vmdk entry under Storage (e.g. SATA0) leaving just the Virtual Disk drive as disk 1 (SATA1 or IDE slave) as shown below. Now boot from the UEFI VM (do NOT use DavidB’s VMUB utility) and it will boot to Windows each time from the Virtual disk 1.

If you use DavidB’ VMUB utility to boot from the E2B USB drive, it will add back in the USB drive (.vmdk) and then it will boot from the E2B USB drive again and a Windows Install will start again.
Boot it in MBR\Legacy mode to return back to the E2B Main menu (use CSM menu option 0) – or run the \e2b\Restore_e2b.cmd batch file from Windows or run \_ISO\SWITCH_E2B.exe and click on the ‘Restore E2B partitions’ button.