Table of Contents
DOS utilities (MS-DOS, FreeDOS, etc.)

If you have a DOS utility such as a BIOS Flash utility or small DOS-based diagnostic .exe or .com file, you can try using the E2B FreeDOS bootable image. This image contains an NTFS driver and so you can directly access files on a FAT32 or NTFS E2B drive. Simply copy on your DOS files to a new folder on the E2B USB drive, boot to E2B FreeDOS floppy image (see screenshot above) from the DOS Menu and run the DOS program!

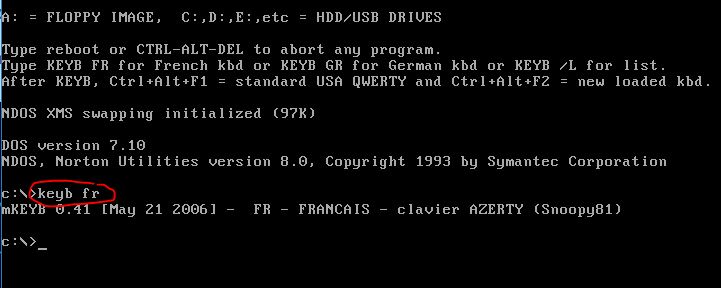
The user can change the keyboard type, by typing keyb UK, etc. – type keyb /L for a list of countries (E2B v1.A5+).
To change to a different folder on your E2B USB drive (e.g. \MyDOS – use names of less than 9 characters and 8.3 filenames)
1. Boot to E2B
2. Go to the DOS menu and run ‘FreeDOS (from a floppy image)‘.
3. When it boots to FreeDOS, type: cd \MyDOS to change to your directory.
4. Type the name of your .exe or .com or .bat file to run it – e.g. FLASHUPD
Drive A: will be the floppy disk image drive letter and Drive C: or D: or E:, etc. will be the E2B USB drive letter.
If you have internal disks with FAT or NTFS partitions, they will also be given drive letters.
IMPORTANT: The DOS NTFS driver is buggy and I strongly recommend that you do not use it for creating new NTFS folders or writing files to an NTFS drive (do not write to the NTFS E2B USB drive). You should only use it to read or run files from an NTFS drive or to copy files from an NTFS drive to the A: drive or other FAT32 drives. If you write new files to an NTFS drive, it may corrupt the existing files!
Also wildcards (*) may not work in some cases. If your utility runs from a .bat batch file, you may need to edit the batch file first (or copy your files to the root of the E2B USB drive). If your DOS utility reports that there is not enough memory available, try a different boot configuration from the menu, or create your own bootable .ima or .img floppy disk image which does not load the large NTFS driver and copy your files into the .ima image.
Tips to modify E2B FreeDOS image:
- Use 7Zip to unzip the E2B.ima file from \_ISO\DOS\MNU\Freedos288.IMA.gz and copy it to \_ISO\DOS.
- You can use WinImage to add or delete files inside the .ima.
- Name the floppy image file as .imarw if you want to keep any changes you may make within FreeDOS.
- You can use 7zip to compress the .ima file to a .ima.gz file.
See RMPrepUSB DOS tutorial here for more details and the RMPrepUSB WinImage tutorial here.
Full details and Exercises in my eBook here.
Another FreeDOS v1.2 floppy disk image can be downloaded from here.
How to modify the E2B floppy image
E2B contains a 7.6MB FAT32 disk image (it is not a 1.44MB floppy image). It loads EMM386, a mouse driver and an NTFS driver. It allows you to run programs directly from the E2B drive as C: or D: or E:, etc. (FAT32 or NTFS, but not exFAT drives).
If you want to add programs directly to the E2B floppy disk image or modify it in other ways, here is how to do it.
1. Download and install WinImage (trial version – please purchase a licence if you find it useful)
2. Use 7zip to extract FreeDOS288.ima from the \_ISO\DOS\MNU\Freedos288.ima.gz file
3. Copy the extracted Freedos288.ima file to \_ISO\DOS folder
4. Double-click the Freedos288.ima file to load it in WinImage
5. Drag-and-drop your DOS files into WinImage to add them to the image
6. Modify the Autoexec.bat file in the image if required (extract it, modify it, copy it back)
7. Click on the blue floppy disk icon in WinImage to save the changes
Now you can boot to the Freedos288.ima file from the DOS E2B menu.Your added files will be on Drive A:.
Name the floppy image file as .imarw if you want to keep any changes you may make within FreeDOS.
You can use 7zip to compress the .ima file to a .ima.gz file.
Boot from Floppy Disk Image Files
If you are provided with a bootable floppy disk image file, E2B can directly boot to it. If you use the .IMA or .IMG file extension, the file will be loaded into memory and will boot as Drive A:
If you change any files on the A: RAM-drive whilst booted to DOS, no changes will be saved. If you want to be able to permanently change files in the image under DOS, use a .imarw file extension. If you use a .imanousb file extension, the image will appear as A:, the USB drive as floppy drive B: (and not as a hard disk).
Use .imafdhdd0 if you only want the internal hard disk as hd0 and the image file as fd0 (writable).
See the file extensions list for other possibilities. See the RMPrepUSB tutorial for more options here.
DOS limitations
- DOS 6 can only access <2GB partitions (FAT16).
- DOS 7.1 or later is required to access FAT32 partitions.
- DOS\FreeDOS cannot access NTFS partitions unless a special NTFS driver is added.
- Files with long file names (longer than 8.3) may not be listed correctly unless you load a LFN driver. Use 8.3 conventional short filenames with no spaces.
See here for more info on limitations of versions of DOS.
Using an .imgPTN file
An easy way to make and modify your own DOS-bootable image is to create a FAT32 .imgPTN file.
Switch to the .imgPTN and then add your own DOS files to the image (just copy files to the USB drive).
This allows direct access to the DOS files without needing to make a .ima or .img file.
After the image file is ‘switched-in’, you can simply copy your DOS files onto the drive and edit them as required.
A ready-made 38MB FAT32 .imgPTN (FreeDos_FAT32_38MB.imgPTN.zip) is available from the Alternate Download Areas.
It does not include an NTFS driver and so can only access FAT partitions but can boot as floppy disk 0, or hard disk 0 or 1.
To make your own .imgPTN file…
1. Find a suitable MS-DOS 7 or 8 or FreeDOS floppy disk image or zip file or set of DOS boot files.
2. Extract/copy the files to an empty new folder (e.g. .\MyDos) on your Windows Desktop.
3. Drag-and-drop the new folder (MyDos) onto the MPI_FAT32 Desktop shortcut (you must install the MPI Tool Kit first).
4. Copy the 38MB .imgPTN file that this makes to your E2B drives \_ISO\DOS folder.
5. Run \MAKE_THIS_DRIVE_CONTIGUOUS.cmd from the E2B drive.
6. Now either MBR-boot to E2B and select the new .imgPTN file or use \_ISO\SWITCH_E2B.exe to switch it in.
7. The E2B USB drive will now appear as a 38MB FAT32 volume. You can directly change the files on it or edit any of the files.
You can test it by using RMPrepUSB – F11 (QEMU) to boot to it (or use Virtual Box+VMUB).
To restore the E2B drive, run \e2b\SWITCH_E2B.exe – Restore E2B Partition(s), or MBR boot from the USB drive and select menu item 0.
Tip: name the file with a .imgPTNAUTO file extension to avoid the ‘OK to switch’ user prompt. Use .imgPTN23AUTO if you want to preserve partitions 2 and 3.
Add you own DOS files to a ready-made .imgPTN file
- Copy the FAT32 .imgPTN file to \_ISO\DOS folder
- Run \MAKE_THIS_DRIVE_CONTIGUOUS.cmd
- Boot to E2B and select the .imgPTN file from the DOS menu or use SWITCH_E2B.exe (SWITCH_E2B does not work correctly with FAT16 .imgPTN files)
- You can now add files and modify the contents of the partition using Explorer. \FDAUTO.bat or \AUTOEXEC.BAT will run on startup and you can add the utilities name at the end of the batch file so that it will automatically run.
- Boot to the E2B USB drive and use Menu option 0 to return to the E2B menu system (or use SWITCH_E2B.exe)
How to reduce the size of a .imgPTN file
The smallest size we can make using standard Windows utilities for a FAT32 volume is approx. 38MB.
If you have small DOS programs, you can reduce the size of the 38MB .imgPTN file as follows (change text in bold as required)…
- 1. Open the .imgPTN file that you want to copy (e.g. FreeDos_FAT32_38MB.imgPTN.zip) using 7zip and determine the total size required by selecting all files (usually approx 6MB)
- 2. Open Windows Control Panel and run ImDisk – Mount New – Image file = C:\temp\MyNew.imgptn – Size of virtual disk = 10MB – OK
This will create a new drive letter for you – e.g. O: - 3. Select the new drive in Explorer (e.g. O:) and allow Explorer to format it as FAT which is actually FAT16 (not NTFS).
- 4. Use Extract in 7zip to copy all the files to the new drive letter (e.g. O:\)
- 5. You can now directly edit any of the files on the new virtual drive
- 6. In Imdisk, use Remove to unmount the virtual drive (wait for 30 seconds after copying files first)
- 7. (optional) Use 7zip to verify that the contents of the new MyNew.imgptn file are present and correct.
Tip: You can delete the \clover and \efi folders to reduce the size required. Do not delete the \PBR.bin, \boot6 file or \menu.lst of \grldr files or the \e2b folder.
Note that Switch_E2B.exe will work with FAT16 .imgPTN files if you choose a FAT32 0x0c partition type when prompted.
A ready-made 10MB FAT16 .imgPTN file is also available in the Alternate Downloads Areas if you really want a smaller image file size.