Secure Booting to a multiboot loader/manager such as grub2 often first boots to an EFI shim boot file which can then load the unsigned/insecure grub2 kernel.
However, the shim which is used (e.g. by Ventoy or agFM) may be blacklisted in the DBx database of your UEFI BIOS NVRAM. This will prevent these shims from being used to Secure Boot.
A Secure Boot system should only boot from signed EFI boot files and should only run signed executable files.
We can convert most bootable payloads such as a bootable USB drive partition (Linux or Windows, etc. made by RUFUS) or a Windows Install ISO or a bootable image or zip file into a .imgPTN23 file using MakePartImage.cmd.
So on Partition 1 of the E2B USB drive we can have many different .imgPTN23 files which will secure boot (e.g. Windows To Go, WinPE, Ubuntu, RedHat, Fedora, etc.). We can select any one of these and Partition 1 will instantly be replaced by the files in that .imgPTN23 file. Note that the filesystem within the .imgPTN23 image needs to be FAT32 because all UEFI firmware can boot from FAT32 partitions (but not all can boot from NTFS partitions).
These .imgPTN23 files can be switched in using SWITCH_E2B.exe (a 32-bit Windows utility) so that you can then Secure-boot from Partition 1. After use, you can restore the original E2B Partition 1 by using SWITCH_E2B.exe again.

You do not need to use another Windows system however if your USB drive already contains WinPE.
- Create a FAT32 .imgPTN23 file and copy it to Partition 1 of your E2B drive
- Run \MAKE_THIS_DRIVE_CONTIGUOUS.cmd to defragment the .imgPTN23 file
- Create a new Primary (not Logical) FAT32 Partition 3 on the E2B USB drive. There should be no Partition 4 – Partition 4 MUST be kept free (unused).
- Copy onto Partition 3 a complete WinPE flat-file set of files – this could be DLCBoot or Strelec or Bob Omb’s WinPE or the special WinPE reduced-size files as detailed in eBook #3 (with download). The WinPE should be UEFI64-bootable and should support WoW64 so that it can run 32-bit Windows applications such as SWITCH_E2B.exe. You can also include a 32-bit Secure Boot WinPE if you think you may need to boot from Secure UEFI32 systems (quite rare).
- You will find a copy of SWITCH_E2B.exe on Partition 2 of the E2B USB drive in the \e2b folder, and it will also be inside each .imgPTN23 file. However, it may be useful to also copy it to the root of Partition 3,
- Now you can Secure Boot to WinPE from Partition 3 and run SWITCH_E2B.exe and select any .imgPTN23 file you like. Then reboot from Partition 1 to run the new payload. When you have finished, Secure Boot to Partition 3 again and restore the original E2B partition 1 using SWITCH_E2B.exe – you can then select a different .imgPTN23 file if you wish.
In this way you can Secure Boot boot to any FAT32 image.
E2B already contains a MEMTEST86 .imgPTN file. Once you have added WinPE to your Partition 3, you can experiment with the MEMTEST86 file to see how this works.
eBook #3 contains details of where you can download ready-made WinPE files from which supports Legacy booting and Secure UEFI32 and UEFI64 booting.
Files >4GB
If your Windows Install ISO contains an install.wim or install.esd file larger than 4GB, you can use Split WinISO to make the .imgPTN23 file.
If you use many Windows Install ISOs or WinPE payloads which have >4GB files in them, you may find it more convenient to simply create NTFS .imgPTN23 files and use the Partition 3 bootmgr to boot from Partition 1.
- Create an NTFS .imgPTN23 file using MakePartImage, copy it to Partitition 1, make it contiguous, select it in SWITCH_E2B.exe and switch it in.
- Run BootIce.exe under Windows and modify the \EFI\Microsoft\Boot\BCD file on Partition 3 to add an entry to boot to the \sources\boot.wim file on Partition 1.

You can now boot from Partition 3 and choose the correct boot option to boot from Partition 1 of the new image.
If you select a non-existent entry by mistake, you can simply try all of them until one works.
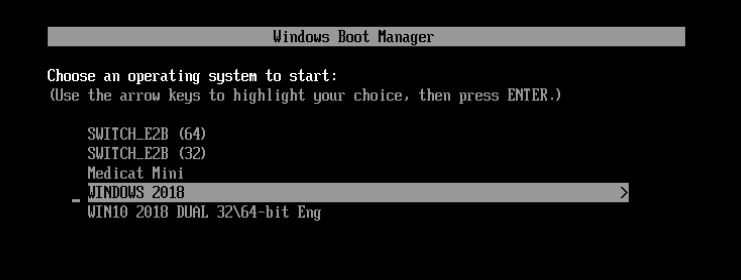
This menu includes options to boot to the small Ptn3:WinPE images that contain SWITCH_E2B.exe (from eBook #3) and also the Medicat Mini Win10 boot.wim file that has been copied to E2B Partition 1.
Each .imgPTN23 file will require a different entry, so you should include the name of the payload in the ‘OS title’ – e.g. Win10 21H2 Eng.
Note: For best legacy\BIOS boot compatibility, it is best to NOT add any \EFI boot folder to the normal large E2B Partition 1 – it may prevent some BIOSes from giving you a legacy\CSM boot option.